


Listen up, parents! We know how thrilling and joyous celebrating a teenage boy's birthday can be. But let's face it: searching for the perfect gift can be intimidating. But don't fret; we've got your back and are in this together! If you're unsure, we've compiled a list of ten remarkable birthday gifts for teenage boys. From gadgets for the tech-savvy to musical instruments or sports equipment for the more creative minds out there, we've got you covered. We aim to get them thinking differently and having serious fun on their big day. We're taking a real-life approach to this list. We understand that safety is paramount, and that's why we've selected items that are not only fun but also safe. Please give your teenage boy a gift he'll genuinely appreciate and cherish without worrying about potential risks. So, with our awesome gift selection, you can rest easy knowing that you've found the perfect gift to make this birthday one for the books!
1. Iphone or Android-Based Smartphones

Teenage boys these days cannot live without smartphones. It's a fact of life. The question is: iPhone or Android-based? Decisions, decisions. With so many options, it can be tough to choose the perfect gift for that special teen in your life. Fear not, because we've got you covered!
- iPhones are no-brainers for Apple users. However, they can be quite expensive, so weighing the cost against your budget is important.
- Don't forget about phone cases! There are literally thousands of designs tailored specifically for smartphones, so your teen can show off his unique style with pride!
- Smartphones (and accessories) make great birthday gifts for teenage boys. Not only do they provide entertainment value, but they also offer educational opportunities through various apps and interactive content.
- Parents can also benefit from gifting smartphones. With parental controls and monitoring apps, keeping track of what your son is doing on his phone has never been easier!
So, whether you choose an iPhone or Android-based smartphone, you can rest assured that it's a gift that will keep giving. Just make sure to set some ground rules before handing it over!
Discover Christmas gift vouchers.
2. Airpords Or Apple Watches
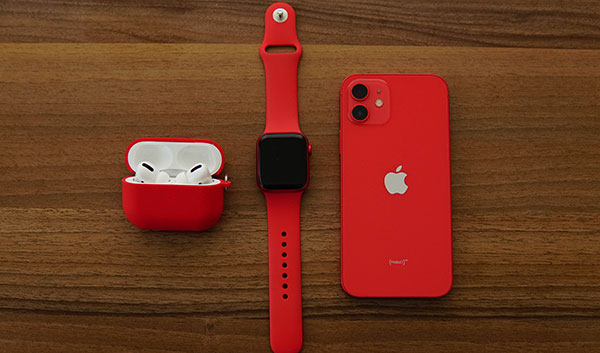
Ah, the age of technology! What better way to celebrate a teenage boy's birthday than with the latest gadgets? AirPods and Apple Watches are perfect gifts for your tech-savvy teen. These devices come in all shapes and sizes, ranging from simple charging stations to full smartwatch models. And don't forget those sleek AirPods that let him listen to music or chat on the phone without any cords getting in his way. These items may be costly but could make great presents for any adolescent who loves his electronics. Not only do they provide plenty of entertainment and features, but they also offer protection for hearing and vision health if used correctly. Additionally, there are many options available when it comes to choosing an appropriate gift; you may not want to spend a premium on Apple. In such cases, you may go for many other reputed smartwatches and wireless headsets available in the market.
3. Guitar Or Ukulele

If you're looking for the perfect birthday gift to make a teenage boy feel like a rock star, look at an acoustic guitar or ukulele. It's the ultimate way to show someone how much they mean to you and give them something tangible to express themselves with music. Just imagine the joy on their face when they open up a beautiful instrument and start strumming it for the first time! Nothing can quite compare to the feeling of learning to play an instrument from scratch and having one as a gift is sure to be incredibly special. Plus, plenty of options are available – from beginner-friendly models to custom designs inspired by Star Wars movies – so finding the right fit for your teen shouldn't be difficult. When deciding between an acoustic guitar or ukulele, it depends on what your teen likes best. An acoustic guitar offers lots of range in tone and volume, while many beginners find that ukuleles have easier chords, making them more approachable. Here are three great choices:
- Yamaha F310P Acoustic Guitar – This model has been used by countless professional musicians over the years and is ideal for those just starting out.
- Luna Guitars Tattoo Concert Ukulele – With its unique design featuring hand-engraved artwork inspired by traditional Polynesian tattoos, this uke looks as cool as it sounds.
- Kala Learn To Play Star Wars Bundle – Perfect if your teen loves The Force Awakens trilogy! This bundle includes everything needed to get started playing quickly.
No matter which option you choose, gifting a guitar or ukulele is sure to bring smiles all around come birthday day! Moving onto our next section about drum sets
4. Drum Set
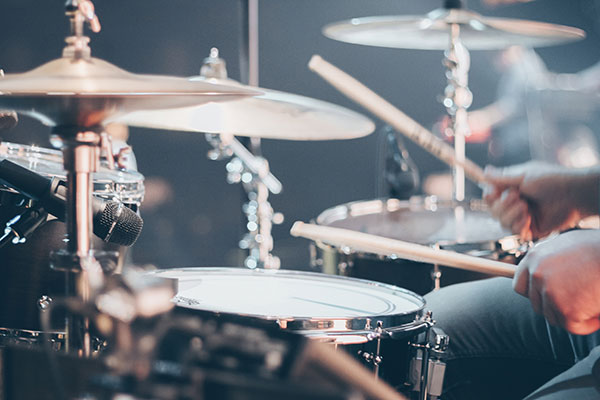
Drums are cool - nothing could be better for teen boys than getting their own drum set. It's an exciting present that offers hours of entertainment and fun! Just imagine: with a drum set, you boys can play along to their favorite tunes or create something totally new. He can rock out in the comfort of their home without going anywhere else. Plus, he may enjoy being part of a band, even if only two members are involved – him plus the drums! Here are some other great features of this awesome gift idea:
- Durability: Drum sets are durable and can be used for long term.
- Flexibility: Users can adjust the settings based on what sound they want
- Variety: From electronic kits to acoustic ones, there’s sure to be one type that fits every budget
- Fun Factor: Teens can bring together friends for a jam session
So why not give your teenager an experience he'll never forget? Allow him to make music in his own space and have endless amounts of creative fun! This gift keeps giving, whether it's showing off those skills at family gatherings or just enjoying a solo beat-making session in their bedroom.
5. Basketball With Hoops

Breaking the bank isn't necessary to find a great birthday gift for teenage boys. Basketball with hoops is an ideal present that they'll be sure to love. It's fun and a great way to stay active and healthy while having friendly competition amongst friends. The basketball hoop can hang on any door, so it doesn’t take up much space in the house, making it perfect for tight quarters or apartment living. The game of basketball helps build coordination, concentration, and hand-eye skills while providing tons of entertainment. If you need a break from shooting baskets, board games like monopoly are always an option! Basketball comes in different sizes depending on age group, so teens will have as much fun playing it as younger children. When looking for something special for your teen this year, consider giving them their basketball set, complete with hoops; it is guaranteed to bring hours of joy!
6. Soccer Ball
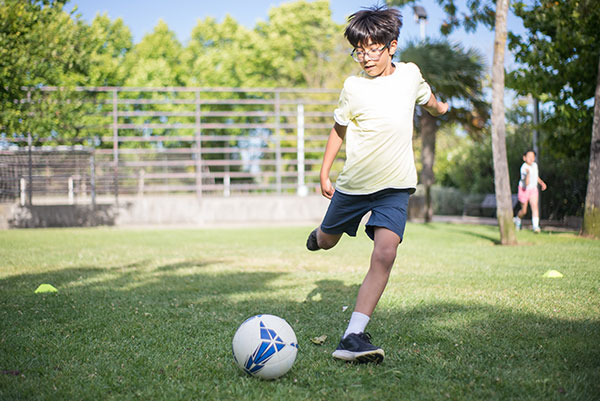
What better gift to give a teenage boy than the classic soccer ball? This timeless sports equipment can provide hours of entertainment and fun. Let's examine why it makes an awesome birthday present for any young man! First, let's explore what makes this gift idea so special:
- Fun Factor: Soccer is a great way to stay physically active; it encourages teamwork and builds camaraderie. Your teen will love playing with friends while developing important life skills at the same time.
- Mental Stimulation: The game's fast-paced nature helps sharpen reflexes and strategic thinking. No matter how good or bad they may be in soccer, your teen will have plenty of opportunities to learn something new each time they step onto the field.
- Social Bonding: Whether on the sidelines or out on the field, soccer provides ample opportunities to meet new people and build meaningful relationships with peers with similar interests.
The perfect blend of sportsmanship and fun makes soccer balls a great choice when looking for gift ideas for teenage boys. Playing soccer also offers physical activity and mental stimulation - all wrapped into one cool package that will bring lots of joy on their special day.
7. Gaming Consoles
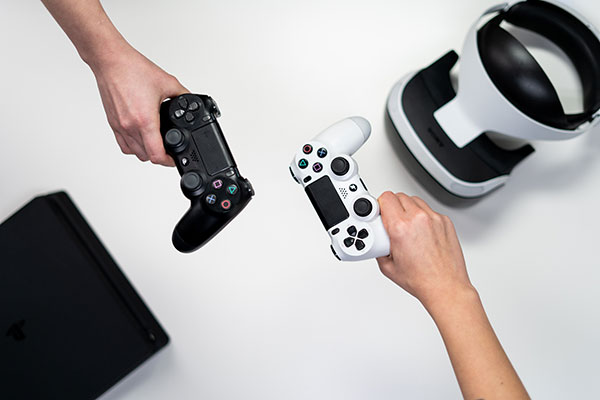
A gaming console is a must-have for teenage boys and makes an awesome birthday gift! With today's technology, the possibilities are endless. Here are just some of the features to consider:
- High-quality graphics – Gaming consoles offer realistic visuals and intense action sequences with controllers tot keep themengaged.
- Versatile games – There's something out there for every kind of gamer, whether sports, adventure, or role-playing.
- Wireless connectivity – Many consoles come with AirPods wireless charging cases, Amazon Alexa, Google Assistant, and other voice recognition capabilities to make gaming easier and more enjoyable.
- Ease of use – Consoles have intuitive interfaces making them easy to operate.
All these great benefits in one package make this present the perfect choice for any teenage boy who loves video games. It'll surely make them smile when they open it up on their special day! Let’s look at what kinds of games can be played on each console now...
8. Video Games For Consoles

So, you want to buy a teenager the perfect gift? What do teenage boys love more than anything else in the world? Games for consoles, of course! Who doesn't like a few hours on their Xbox or PlayStation after school and during weekends? Let us take a look at some great gifts that will make any teen gamer jump with joy:
- Gift cards - With a choice between Microsoft Store, PlayStation Network Credits, and Steam Wallet Cards, what better way to show appreciation than buying them something they truly appreciate?
- Tech Gifts - Teenagers nowadays are pretty into tech gadgets (not surprising). So why not spoil them with an upgrade to their gaming setups, such as headphones, controllers, and other accessories?
- Subscriptions - Services such as Xbox Live Gold or PlayStation Plus can be excellent presents that keep giving throughout the year. They provide access to online multiplayer games and free monthly titles, which is always nice.
If your teen is adventurous, then an escape room gift card will get them in an epic mood!
9. Sports Sneakers
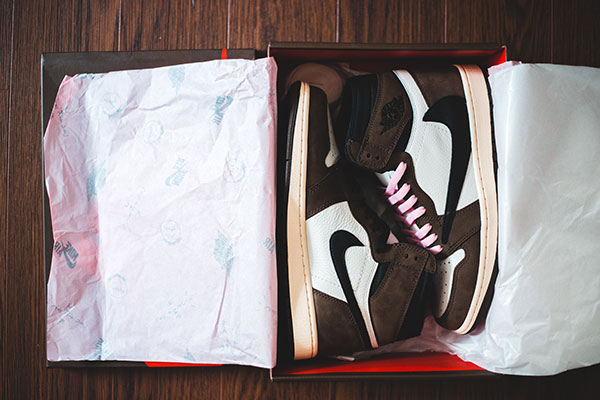
When it comes to finding the perfect gift for teenage boys, sports sneakers are a great choice. They offer comfort and style that will bring a smile to any teen's face - plus, they can be used in all kinds of activities! Here's what makes them so special: Firstly, sports sneakers come in an array of colors and styles. From bright neon hues to subtle earth tones, there's something out there to match every teen's personality. Plus, many of these shoes have been designed with durability and breathability, making them ideal for everyday use or intense workouts. Secondly, these shoes can often take teens from the school straight into their favorite activities. Whether playing basketball on the court or running track at practice, quality sneakers will keep up with their busy lifestyles while providing support and protection during physical activity. And finally, most brands also make sure that their products are made with eco-friendly materials - helping reduce our impact on the planet.
10. Backpacks
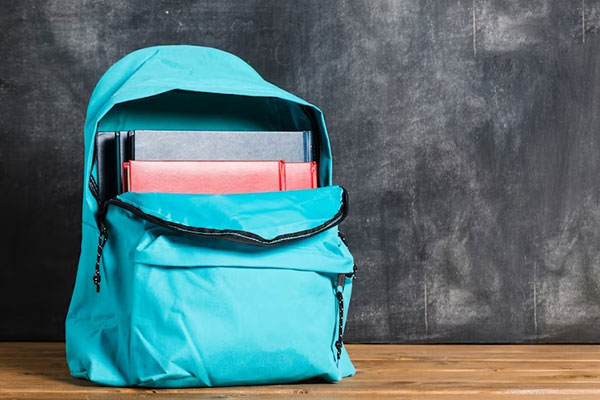
Backpacks are essential for teenage boys carrying their everyday belongings like books and laptops. With a good backpack, you can get your boy the perfect combination of form and function – without breaking the bank. Whether they’re in high school or college, backpacks make great birthday gifts that will always come in handy.
When it comes to finding affordable yet stylish backpacks, plenty of options are available today. From traditional styles with pockets and compartments to more modern ones with built-in laptop sleeves and USB charging ports, these bags provide functional touches designed specifically for busy students on the go. Plus, since most backpacks come in various sizes and colors, you can easily find one that fits his personality and style perfectly.
No matter what type of backpack he chooses, you can rest assured that it won't take too much space at home nor drain your wallet as other awesome presents such as hair dryers brushes might. So why not surprise him with a new backpack this year? It's sure to be appreciated by any teenage boy!
Before You Go
Finding the perfect birthday gifts for teenage boys can be difficult. But with some careful consideration, you can find something they'll appreciate and use. Considering their age and interests is important to make the gift practical and fun. Considering any budget restrictions, plenty of options will make them smile on their special day - from gaming consoles to creative hobbies.
Throw an ultimate birthday bash at a trampoline park.
When selecting gifts for teen boys, it pays to think outside the box. A great option might be something that encourages physical activity or fosters creativity. Educational toys are also an excellent way of tapping into their minds while having fun at the same time. So if you're looking for something special for your teenager this year, don't forget to explore these ideas!
At the end of the day, giving a thoughtful present shows how much you care about them and appreciate all they do in life. If money is tight, but you still want to give something meaningful, why not try surprising them with a heartfelt gesture? After all, as the saying goes, 'it's not what you give but how you give it.'